Showing posts with label washitsu. Show all posts

Monday, 3 February 2020

Pictures, Pictures, Pictures!

3 weeks and counting! This week, rather surprisingly, has absolutely flown by and we are now only 2 visits to site away from moving in. I say we when actually I mean Yuko. Sunday marked my last visit to site before we have the keys in hand as I will be off to Cambodia on Thursday to present at a conference before heading to the UK for a week to see family. Not the greatest timing but that's where weeks of delays will get you! 

All this means that Yuko will have to head over without me and take some pictures between now and moving day. Hardly ideal but we both want to make sure this blog gets finished properly, so we will do what we can. Expect a couple more posts after this one between now and moving in but don't be surprised if we fail miserably. We'll do our best!

As I mentioned, we went over on Sunday in the morning and the changes were apparent as soon as we arrived. We took a lot of pictures so probably the best way to explain the changes is for me to just put a selection of them below and caption each with an explanation. Here goes...

stone apron
Grey stones we have added to the apron of the house. To the left is the concrete on which the outside tiles will sit. To the right is the border with the lawn which will go around the other side of the house. 
stone apron
The same stones, viewed from the opposite angle. Walking down here is still a little dicey. Will feel much safer when the roof is over the car parking area. We really like the color contrast though.


stone apron
The other side of the house. View to the east. The concrete slab is the area for drying clothes. On the right will be flower beds. They are horribly overgrown at the moment. Not sure what the pile of wood under the blue tarp will be used for.

stone apron
Looking back the other way to the west. The trees next door are actually quite nice to look at. Again, the border at the end of the stones will be lawn.

stone apron
The east side of the house. Soon the be filled up with all sorts of air conditioning units and other equipment. Actually feels very spacious and easy to walk down. I remember when the scaffolding was up and we were really squeezing down here.

stone apron
Something else has been connected. Not sure what yet!

garden earth
The garden has been partly leveled. Landscaping starts today and the lawn, which will cover the whole area here, is the last thing that they will do.

slope garden japan
The temporary ladder that adorned the slope has finally been removed, ready for landscaping. Given how steep and dangerous this slope was to go up and down, we are really looking forward to being able to do so safely.

genkan porch tiles
Concrete has been laid ready for outside tiling. We went for quite a big area of tiles to fit the proportions of this part of the house.

genkan porch tiles
The tiles for the outside entrance. Piled up and left in boxes outside. It's nice to live in such a safe country. Can't imagine them lasting long in London!

name plate concrete black
Wiring for the name plate and intercom. After a lot of back and forth, we ended up sticking with the original grey intercom system though we did change the light and name plate to black. Should look good I think.

mystery connection
A new connection. Not sure what this is yet either!

genkan getabako shoes box
Shoes box in the genkan. The window gives loads of light without compromising privacy. Cupboard is pretty deep too so we should be able to put flowers and ornaments on top without too much trouble.

genkan coat closet
The coat closet in the genkan. This was the builders' idea and it's a really good one I think. It's always difficult to figure out where to store bulky outdoor coats and bags. I haven't seen this before in a Japanese house.

study white walls
The study, now with white walls! The room looks much bigger and is absolutely filled with light. This should be a very pleasant place to work. The walls are not completely finished yet but this room is getting pretty close.

walk in closet
Walk in closet. We are relatively tight (<1cm) on the RHS for the furniture we want to put in here so we have sent a message to the builders asking them to install very minimal skirting boards along the right hand wall. The PAX closets should look really good in here.

master bedroom
Master Bedroom. Love the wooden beam. Difficult to believe we were considering covering it with white at one point. Very glad that we didn't. In the corner is a box of new 6A network cable, which you may recall from last week's post. Loads of natural light in this room too.

master bedroom
The master bedroom from a different angle. I think we made the right choice to not have a door on the Walk in Closet. I think the two spaces flow together better. We will have curtains across the big doors to the deck outside.

storage cupboard
First look at the storage cupboard opposite the toilet. We had thought the vertical divide would only go up as far as the horizontal shelf height but floor to ceiling is much better in fact. This is a pretty big space, surprisingly so in fact. Will be home to skis and my ancient set of hand-me-down golf clubs.

laundry room
Laundry room. The white wall is the splashback for the washing machine (LHS) and the sink (RHS).

laundry room
Here you can see the shape of the counters we have had built into this room. The height is great. The LHS counter has the same depth as the cabinets above it, whereas the RHS counter comes up further than the cabinets and can be used for ironing, sewing and sorting clothes.

laundry room
The RHS counter. Depth is really good I think. We will put a stool underneath for sewing or lazy laundry.

bar counter breakfast
Breakfast Bar counter. It is surprising how well this seems to function as an actual bar counter. I can imagine enjoying a pint or a cocktail sitting here as well as a bacon sandwich (perhaps together?) The wood on top is wonderfully smooth and solid feeling. The vertical wooden poles are temporary and for support. 

bar counter breakfast
Viewed from the living room. You can see that the breakfast bar is quite wide. It should accommodate either 2 or 3 bar stools. We haven't ordered them yet as we want to check the height using our battered IKEA low stools as a guide.

bar counter breakfast
Breakfast bar in relation to the kitchen (RHS) and living room (LHS). Connected to the breakfast bar will be a 65cm island unit. The dining table will be on the side closest to the camera (Photo taken from next to the window that overlooks the garden)

washitsu japanese room
Japanese room. Now raised and enclosed. You can see the two holes at the bottom which will house the sliding drawers. It is a very satisfying step up from the living room. Feels very cosy, as a Japanese room should.

washitsu japanese room
Flooring for the Tokonoma part of the room. This will be wood as opposed to tatami straw mats. We had originally planned to put low shelving here but couldn't figure out what style and size so we opted to go without until we have lived in the house for a while.

washitsu japanese room
Ladder for the loft area above the Japanese room. I was surprised to learn that this too is made of wood and far more stylish than I had expected. I thought we would be getting a lightweight metal ladder but this is really nice!

staircase
Stairwell staircase now with white walls. The yellow thing is a foam protector, not some funky new handrail design.

staircase
Staircase up to the roof balcony. Looks great with white walls and blue sky. The roof balcony is still just a few steel struts. Construction on that is due to start in about a week and a half.

wooden sliding doors
Wooden doors delivered and ready to be installed. They are beautiful, very heavy sliding doors. The woodwork is exceptional.

That's a lot of photos! If you are still reading, I hope you enjoyed the latest installment. I will do my best to get the next update up as soon as I have the photos from Yuko, so in about a week's time. Thanks again for reading and talk to you in a few days!


Wednesday, 29 January 2020

Preparing to Move, Furniture and Tiles

26 days to go until handover day. So near and yet so far! It seems that one moment time is flying past and the next it is a slow and relentless slog to the finish. We will get there.

Firstly, moving plans. Yuko and I got quotes from a number of companies to move our things from our small flat in Central Osaka over to the house about 15km away. We had originally planned to get quotes to move just a few big items (the fridge, mattress, TV board and TV), taking the rest in several trips by car. Nevertheless, we decided to get a couple of quotes to transport all of our stuff just in case.

Fortunately, we got really lucky with an eager salesman from one of the major moving companies who reluctantly decided to match a quote from a much smaller company we had found online. After a tense negotiation, we ended up agreeing to just under 40,000 yen to move everything, including all the boxes and packing materials on a fixed day within a 4-hour window. Our initial research and canvassing of friends, a couple of whom work as estate agents, suggested that twice this amount would have been normal. Good work us, I guess.

We've been to site a couple of times in the last week, the first at nighttime during the week because we were bored and fancied a walk. It was great fun clambering around the house using our phone lights as torches before something unexpected happened. It was about 8pm (and so the workers had all gone home) when we heard a noise outside. I looked out the window to see that our site manager had returned in a truck to drop off some materials.

Wondering what he would think to find the dark house illuminated by smartphone lights, I quickly leaped into action and ran outside. "It's us. Don't worry", I said in Japanese rather frantically. I'm not sure whether he was more shocked or amused but we managed to avoid an unfortunate incident with the local police at least. He even put the electricity on for us so we could have a proper look around.

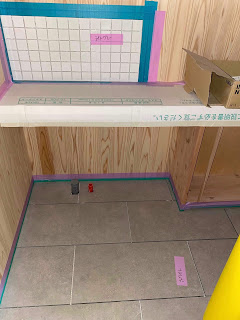
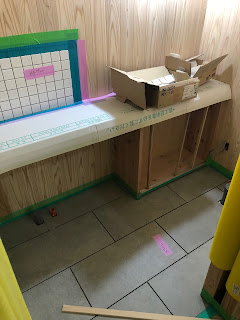
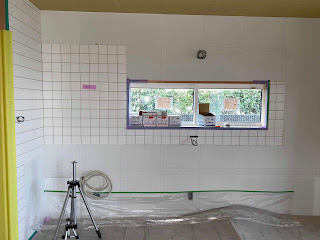
In doing so, we found that the tiling for the toilets, laundry room and bathroom had all been laid and was waiting to be grouted. We are especially happy with the rectangular pattern of the toilet tiles which matches the shape of the room perfectly.

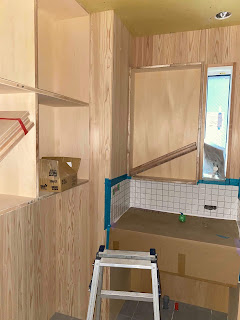
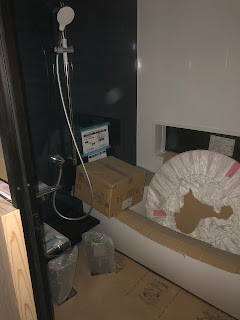
We were also able to see that the first pieces of built in furniture have begun to take shape in the bathroom and the toilets. Although these are covered up with protective covering, it is at least now possible to see what the shape of the inside of the room is going to look like. The bathroom, in particular, feels bigger than we had expected, a nice thing to discover in a room that we worried was too small.

The process of raising the floor of the Japanese room has also been started and we are both really happy with the height. It is high enough that the two pull out drawers underneath should have some function but not so high that it separates the space off from the rest of the living room. I'm sure it will have a different feel entirely once the tatami goes in but we like how this room is shaping up.

The rest of the last week has involved spending lots of money on various appliances and having to re-specify some items that have become discontinued in this never-ending process. The new stair lights are more expensive but the new kitchen and porch light are cheaper so we should come out about even.

Now, I don't often complain on here because in general we absolutely love the company we are working with and they really do go out of their way to be helpful. However, it wouldn't be a very informative blog if we only talked about the good things so a bit of a rare grumble - we were pretty annoyed to find out that the electrician had installed Category 5e 1Gbps LAN cabling in the walls, despite this not being anywhere close to the latest standard. There are 9-year old articles online that suggest not installing it and using Category 6 instead. Category 6 cable is now only about 20% more expensive and can allow speeds of up to 10Gbps over distances of up to 55m and newer Category 6A cable can facilitate this over 100m (again at a price of not much more). 

Yes we should have thought to specify this in the first place but it blows my mind that an electrician would install this old technology without asking first. Japan already has 5Gbps and 10 Gbps Internet services (although they are not yet the norm) so we would have been starting with something that is already becoming obsolete. Hardly fits with the idea of future-proofing the house. We have re-specified with the 6A cable. Sigh.

That minor annoyance aside, we are really happy with how things overall are progressing. It's clear there is a lot of work to go but everything is set for us to move in under four weeks! We will head to site as usual on Sunday and hopefully there will be a lot of new things to take pictures of. Next week I am heading overseas for a conference and a quick trip back home so I will be away for about 2 weeks. Yuko has promised to head to site and take some photos for me so I'm hopeful that I can put up one or two posts. The landscaping will be starting next week so there should be even more to write about!

The countdown continues...


Raising the Japanese room. RH 2/3 will be the two sliding drawers

fusuma runners wood
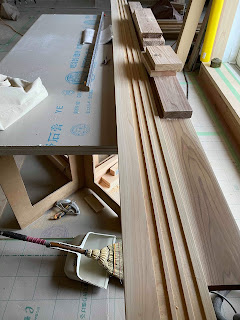
Beautiful handmade runners for the sliding fusuma doors

furniture bathroom
Shelves and cabinets being made (and then covered up)

bathroom tiles toilet
Tiles on the floor of the toilet and tiles behind where the sink will be

toilet tiles rectangular
Rectangular tiles in the toilet downstairs

Upstairs toilet tiles

Kitchen tiles on the wall

bathroom boxes
A (still smelly) bathroom full of boxes


Friday, 25 October 2019

Which Washi?

Greetings from a very rainy Osaka. It's been a busy week and a half since I last managed to get a post up. Sadly, Japan are no longer in the Rugby World Cup after losing to South Africa last Sunday. I hope that the rugby fever that has been everywhere in Japan over the last few weeks will continue long after the tournament finishes, especially given that Osaka and, in particular, East Osaka is the home of rugby in Japan. In fact, our new house is only about a 40-minute walk from the national stadium.

We had a house meeting last Saturday, mainly to inform the builders of our final sizings for the bar, the kitchen and the shokkidana. We ended up moving the bar counter height from 85cm to 75cm in order to make the three upper shelves a bit further apart. Having re-measured some of our bottles, we figured this would give us a bit more flexibility and that, on balance, this was more important than the counter height.

We also ended up reducing the height above the more open part of the shokkidana and bringing the top cabinets down a bit. This will help Yuko, who is the height of a small child, reach things at the top whilst still giving us enough space above the microwave for ventilation. We specified a few changes to the kitchen including a kind of floating drawer in the tallest cabinet so we can make best use of its height.

We also chose the handles for the kitchen which will be 9mm wrought iron and should match really well with the dark grey granite counter we have chosen. (They are made by a local Osaka company and you can see pictures here.) Judging by the reaction, I think our architect was very impressed with the choice!

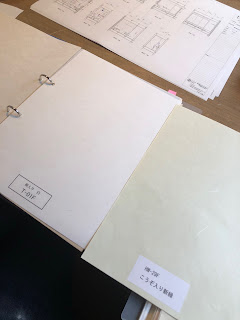
The final choice that we had to make was for the washi wallpaper for the Japanese room. Although it is traditional to use sand or mud mixes in a kind of wattle and daub technique, in recent years wallpaper made of Japanese washi paper has become much more popular due to its ease of installation and cheaper cost. Using this paper does not, however, absolve us of a big decision to make - colour.

At the previous meeting we were given two large folders containing washi samples. When we got home, we had excitedly looked at the various options and then put the folders away, not opening them again until the night before (pretty standard procedure). We actually resumed discussions at 11pm the night before the meeting which was less than ideal in terms of timing.

The first big decision was whether to contrast with the living room or not. Doing so would create a more separate space, whereas not doing so would potentially make the living room seem bigger. However, since the walls in the living room are going to be pure white, we would have to have the same in the the Japanese room, which neither of us were keen on. We both agreed that the space would be better if it were a little separate and cosier so we decided to choose a colour. 

Initially I had suggested moss green but Yuko was less keen and preferred some of the light beige options. I liked the light beige options but was a bit concerned that they were too light and would look too similar to the white walls of the living room. We ended up settling on some darker yellow-ish brown options as we felt they would match well with the light wood around the room and the inside window frames (which in this room only are light wood coloured rather than white). We agreed this subject to asking for some advice at the meeting the next day.

At the meeting, we joked about the fact that we have weeks to make these decisions but always end up turning up to the meetings without a definitive choice. We were kindly assured that this is, in fact, not uncommon. The architect thought we had chosen pretty well, before adding that moss green would also look nice. My eyes lit up, of course, that having been my initial choice. Yuko took another look at the green and said, "ok, let's do that!" so we are having light green walls after all. 

Hopefully, the different coloured walls should give the room a peaceful, cosy atmosphere, especially since most Japanese guests will be sleeping in there. Equally, the room won't always be a stark contrast to the living room as we can use the fusuma doors to close off the space. We decided to use white paper for these to match the living room so that the 'wall of doors' blends in as much as possible.

After the brief meeting, we had a quick trip up to the house to look around. Progress is still pretty steady but unfortunately we are not going to be in for Christmas. Disappointing but can't be helped I guess. At any rate, December should fly by with Mum's visit (now involving some travel round Japan) and then New Year down in Hiroshima and then a move-in date of sometime towards the end of January.

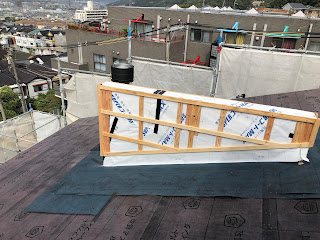
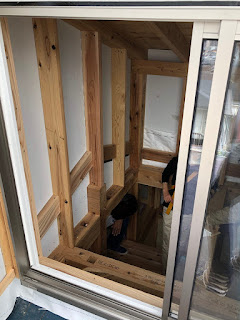
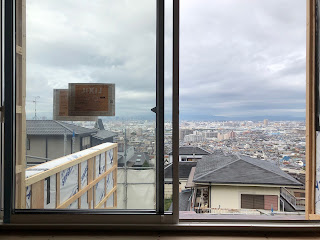
Finally, we were able to clear up the mystery wooden triangles from the photos last time. They were not in fact parts of staircase but rather the frame for the roof deck, the outsides of which are now bolted onto the roof. We were surprised to be able to head out there, this time via the loft space above the Japanese room and some temporary steps out through the top windows (to which the staircase will lead). Heading up and out there was an awesome experience and the views were spectacular. I can't wait until this is all finished!

That's it for this week. I'm hoping to get over to the house this Sunday and see how things have progressed. There's been so much rain this week so I'm not sure if they've managed to get a full 6 days of work in. Nevertheless, I'll get the pictures up as soon as possible when I have them. 


washi washitsu paper walls
The paper for the Japanese room. LHS is for fusuma doors. RHS for the walls

roof nori dark wood stain
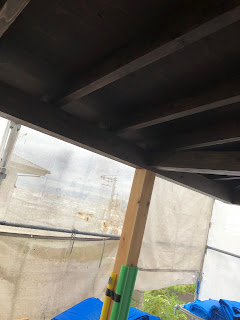
Dark staining under the roof overhand above the wood deck. The uprights will be stained the same colour

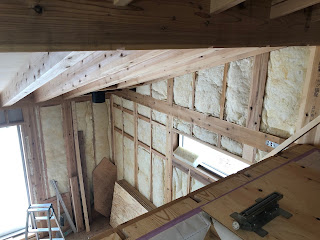
insulation wall japan house building
Insulation above doors in the master bedroom. 


roof balcony japan
The mysterious wooden structures, revealed to be roof balcony frame

roof balcony access japan hatch
Looking back from the roof balcony through the access doors/windows. Getting in and out was really easy, even without a staircase yet


house roof chimney japan
Chimney from the wood stove next to the edge of the roof balcony. Servicing this should be pretty easy 
mountain view japan osaka
View up the mountain from the roof balcony


roof balcony view japan osaka
View from the top of the staircase out onto what will be the roof balcony

japan loft space
Living room viewed from the loft space above the Japanese room (this was how we accessed the roof balcony)

loft space
Loft area above the Japanese room. Even Yuko can't stand up in here!

view from loft
View of the living room from the loft area above the Japanese room

skirting japan living
Starting to mark out where the walls will be. We have a kind of skirting that goes around the top of the room, bringing the walls in about 65cm. The living room will be quite different when it is in. Smaller too :-(

japan balcony doors lixil
The second floor balcony. Looks a bit like a bathtub!


竣工 - The End :-)

Greetings from our new home! It seems crazy to be saying that but we have finally moved out of our small apartment and are now officially (p...