Winter greetings everyone - just a week to go until Christmas! Things are certainly winding down here in Japan so this will be one of the final updates for 2019. Yuko and I have another 3 trips over to site in the next two weeks but I can't promise we will be able to get any blogs up. Mum is coming over from the UK for 9 days and we will be out and about touring Japan (she has no idea where we are going yet!).
This week our house was tested for air-tightness using a kind of big mechanical fan and a computer in order to generate the readings. Our builders take air-tightness pretty seriously with insulation and correct sealing a priority at all stages of construction. Their aim in our case was to create a house that 'leaks' less than 1.0cm2 per m2. Our reading came out at 0.6cm2, which some Googling and consultation with other house builders we know tells us is excellent.
To put that in perspective, another family we know with a Passivhaus-type house in the North part of Japan (much, much colder and snowier than Osaka) had a reading of 0.4cm2. Burning 6 logs on their wood burning stove in the evening keeps their house warm until the evening the next day. If we can get anywhere close to that, we'll be very happy.
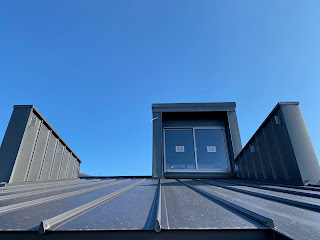
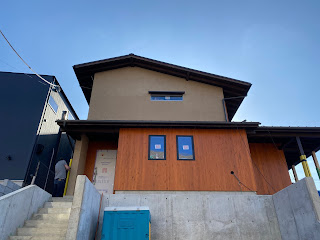
Last Sunday we headed over to the house just after lunchtime to discover that the mortar has lightened a little bit since the last visit. The slightly brighter colour looks great, especially when it catches the sunlight. Other than that, the house is pretty much identical on the outside, although the side walls of the penthouse on the roof now match it in colour (this may have happened a while ago but the only place to see the penthouse is by looking back from the second floor balcony, which we kept forgetting to do).
Inside, there are some relatively big changes. Firstly, we now have a staircase from the ground floor to the living room floor. The woodwork looks excellent (although most of it is under protective covering) and the gradient is perfect. Holes for foot lights and switches for turning them on are all where they are supposed to be and the wires are labeled correctly. The cupboard under the stairs looks like it will be spacious and practical.
The only problem currently is getting up and down the staircase. Since they are still preparing to build the stairs from the upstairs up to the roof, the second floor has temporary boarding in place over the new stairs with a small hole through which to emerge. This means that the second part of the climb from downstairs involves crawling up like a tortoise. Going down is not much easier.
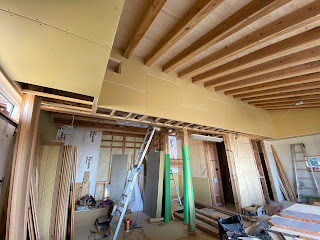
Upstairs, the ducting is now pretty much all in place and mostly boarded over. We were probably lucky to catch it this week as before long it will be completely covered up and we will no long be able to see how it works. I'll use the photos below to explain it as best as I can:
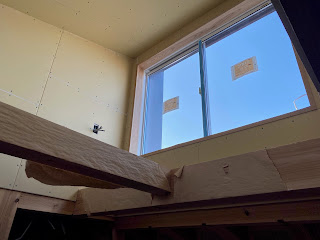
The black thing is the fan that draws warm air from the living room upstairs through the long silver pipes hidden within the ducting around the top of the room. This fan will eventually connect up with a downward pipe on the LHS of the picture above which will transport the warm air downstairs. It is then released through vents in the downstairs floor, heating the downstairs areas of the house. The hot air then rises and is blown back down again, creating a cycle.
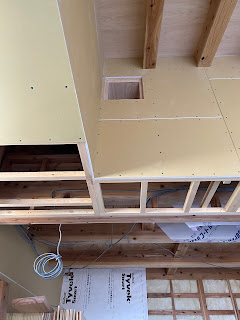
Here you can see how the pipe runs inside the ducting. A few more days and this will all be covered up.
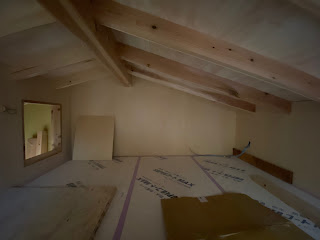
Here you can see how the ducting runs along the top of the room. It has encroached a little bit on the highest point of the ceiling and the room does feel a bit different now it is filled in, although it actually frames the space quite well I think.
At the top is the little window through which the hot air will pass into the pipe.I guess it is going to have some kind of vent or grate across it rather than just a hole. Interesting that such a simple looking hole in the wall hides a relatively complex system behind it.
Pretty clever eh?
I guess that's where I should wrap up for this entry. I'll put the remaining photos we took below with a comment under each as per usual. I'm hopeful that I will get another entry up before the end of the year but you never know. Time always seems to get away from me in December. If for any reason I don't manage it, have a very happy Christmas and a great start to 2020.
 |
| Machinery for measuring air-tightness |
 |
| The cupboard under the stairs! |
 |
| Looking down from loft space above the tatami room at the upper stairs construction |
 |
| Loft space above tatami room |
 |
| What will be the top of the stairs. The penthouse entrance! |
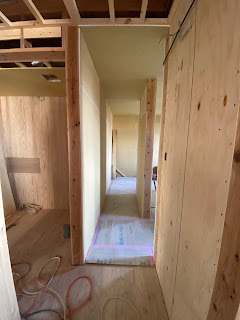 |
| Corridor leading towards the kids room |
 |
| Looking back down the same corridor |
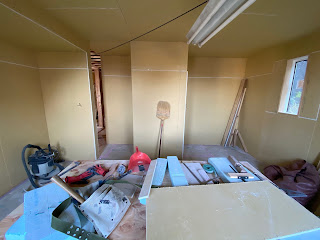 |
| Kids room. Can be split in two at a later date around where the brush is |
 |
| Roof terrace walls |
 |
| Mortar colour. It's a bit lighter than before |
 |
| Colour combination |
 |
| Final gratuitous photo of the house |


A merry Christmas and happy 2020 to you and Yuko Tom! I’m a fellow Brit that has just bought a 12x15 piece of land in Nozawa with intention to build a ski lodge in the coming few years. You’ve done a great job of documenting your journey thus far and have inspired me to do the same!
ReplyDeleteOne area where you understandably avoid is cost breakdown. I’m looking to set a budget for my place (with no idea of Japan building cost) and was wondering if you could give me a top level number you are looking at with any breakdown you may have (earthworks and piling, foundation, frame, etc) You can email to richysam (at)gmail.com if you prefer not to post here.
Rock on with blog posts! I’ve just read your cover to cover over the past half day. Infectious to say the least!
Hi, Tom here. Thanks very much for your comment. Glad to hear you have been reading and enjoying the blog. The ski house project sounds very exciting!
ReplyDeleteAs for costs, it’s not something we are desperately keen to discuss as every build will be very different. To give you an idea, we spent about 50% on top of the cost of our weird and difficult land getting it right and creating parking spaces etc. The net result is under what the land would sell for if we sold it now I think so I think this was money well spent.
As for the house, most estimates you will find are between ¥500,000 and ¥900,000 per tsubo and our house fits in there somewhere. Quality varies massively so choose a builder carefully. If they get to salesy, I would say run a mile. Choosing a good builder who you trust and won’t rip you off won’t necessarily be the cheapest but you will come out the other side feeling better about everything I think.
If you want to discuss further, drop us another comment and I’ll reply by mail.
Thanks Tom. I have some sketches to share to seek and opinion and have a brief chat about. Would you mind emailing richy(at)gmail.com and I’ll send them over. Cheers! Rich.
ReplyDeleteSure - no problem
Delete