Good morning! I hope everyone had
a good weekend. This is hopefully Post 1 of 2 this week since there is too much
to cover in a single update. A good problem to have I think!
Yuko and I went for a house meeting on Saturday morning at the building
company's office. Outside a group of workers were busy replacing the old
iron roof of the main company building. It was pretty mesmerizing watching the
roofers bouncing around the scaffolding removing pieces. I'm amazed how quickly
they worked, and without ropes either!
This was also the first time this winter that the builders were using the wood
burning stoves so inside the office was very warm and cosy. The smell from the
burning logs was a further reminder that we are nearing the finish line and it
won't be too long before we can be enjoying winter fires of
our own.
On that note, we have a notional handover date of the last day in January. We
are pragmatic enough to know that these things don't always work out as planned
but we do at least have a date in the diary. I have an overseas conference to
attend a week later followed by a trip back to the UK so we're doubly hopeful
that we can stick to that date. If we can't, we will deal with it. As I've said
countless times already, we are used to waiting.
At the meeting, we mainly discussed the kitchen and the position of taps and
handles. We added a towel rail to be placed just below the sink from the same
ironmonger who is supplying the cabinet handles. We also decided to change one
of the plug sockets on the island from a Japanese 2-pin to an American 3-pin
(which has an additional round earth pin). We have a couple of American kitchen
appliances that we figured it would be nice to use without an adaptor.
(The voltage in Japan is 100w which is compatible, although appliances may be
slightly underpowered since America is 120w. We are lucky that Osaka has the
same frequency (60hz) as America, whereas in East Japan it is 50hz and things
like timers and clocks may not work properly.)
The main focus of the meeting, however, was to discuss the landscaping and so
we talked about this with our builders before meeting the landscaping company
themselves on site. It was quite nice to be able to do this first since our
builders are a 'neutral' third party and don't handle the landscaping
themselves. They have referred us to a landscaper who has worked with
their previous clients but there has been no hard sell or anything like that -
we are free to use this landscaper or not. Discussing the proposals before
meeting the landscaper gave us a chance to think and ask some questions,
especially valuable since neither of us know anything about landscaping!
When we first saw the drawings provided by the landscaper, we were both pretty
taken aback. It looked like something out of a magazine! As you know, our plot
is currently blessed with a rather ugly, overgrown slope of unusable land that
we have always considered to be restricted to "damage limitation" in
terms of what we can do with it. This proposal somehow seems to have taken the
difficulties of that sloped area and turned it into a feature in itself. At the
same time, practical improvements to provide access and utility have been
added. As you will see below, it would be quite the transformation!
After looking at the proposals, it was time to head to site to meet the
landscaping company. The representative was a nice guy who listened to our
questions and gave sensible advice. I imagine he would be pretty easy to work
with. He also seemed to be well in tune with the idea of
prioritizing certain things in order to fit a budget. This is not a given
at all in Japan where conversations frequently involve questions like "do
you like it?" without considering the cost. I might like a tree if it
costs 8000 yen but I like it a lot less at 80,000 yen! He seemed to appreciate
this.
Anyway, onto the pictures! Just to remind you, this is what the slope currently
looks like:
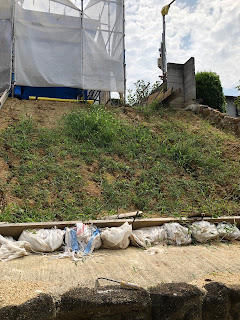 |
| The current slope |
And here are the proposals:
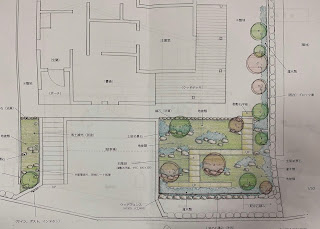 |
| The landscape plan |
 |
| View from the road |
 |
| Proposed materials, plants, trees and samples of previous work on sloped gardens |
Here you can see the basic idea.
The left hand side could feature a small tree with ground coverage behind and a
few strategically placed stones. We talked about whether or not we even need to
have a tree there, especially given that the house next door has 3 trees
already not far from that area. I think on balance we would like one but it may
not survive the trimming of the budget.
On the right hand side, you can see how they propose to use the slope. The main
feature is a kind of zig-zag stone pathway built into the side of the slope,
culminating in a horizontal path at the bottom, also in stone. In front of the
path at the bottom is a 1 metre high fence which gives some privacy as well as
a line of demarcation between the end of the garden and the road. I think we
could potentially lower this by 20cm.
Ground cover (I believe kind of like wild grass with flowers and other things)
is again in abundance with a number of strategically-placed trees to break
things up. We talked with the landscaper about changing some of these to
fruit-bearing trees to give us nice things to eat as well as visual
stimulation. No problem at all, apparently.
One thing that is unlikely to survive the budget trimming and that we are not
even sure we want anyway is the line of trees extending into the garden at the
top. Whilst they would provide some privacy protection from the house in front,
there is currently no one living there and we may wish to use that area for
additional flower beds or lawn. In the hot summer, small trees there would
provide a bit of shade but only for the first floor and all of our living
spaces are upstairs anyway. We could always add some more trees later if we
wanted to.
The quote we had requested didn't include the laying of lawn for the rest of
the garden as this is something we were planning to do ourselves. We did
however ask for the landscaper to quote for doing this too, since neither of us
has any expertise and we don't have any tools. If it's reasonable, we may just
ask the landscaper to do it for us.
All in all, the landscaping would take about 2-3 weeks if we opted to go with
this company and it seems that they could probably carry out the work whilst
the house is being built (although it might be easier to wait until
afterwards). We will wait to see what happens to the quote after removing and
re-specifying a few things but we are pretty impressed with what they
have come up with overall. Interested as always to hear what you guys
think!
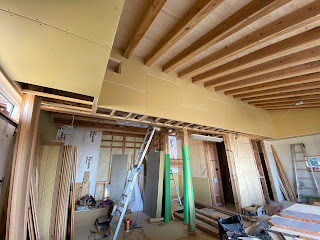
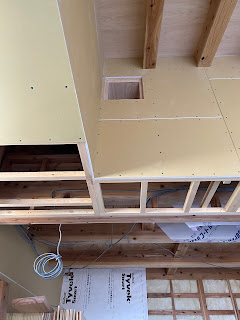
I'll hopefully be uploading another post later in the week with developments on
the house itself so look out for that. In the meantime, have a great week and
speak soon!